When scanning large format negatives I discovered that I was often clipping highlights and shadows without realising it. It wasn’t until I opened the massive files in Photoshop that I discovered the clipped highlights and/or shadows. After waiting a long time for a high resolution scan to complete it’s a bit frustrating to have to start again after a tweak to the histogram in Epson Scan. Even worse if the tweak isn’t enough and it’s still clipped after the second scan!
My solution is to be more careful to analyse and set the white & black points before scanning the whole frame. I do this by reducing the size of the scan frame to a small box and then move it around the image, checking and adjusting histogram.
Move the box over a small highlight area, then modify the histogram white point to make sure nothing is clipped. Then do the same for a shadow area with the black point.
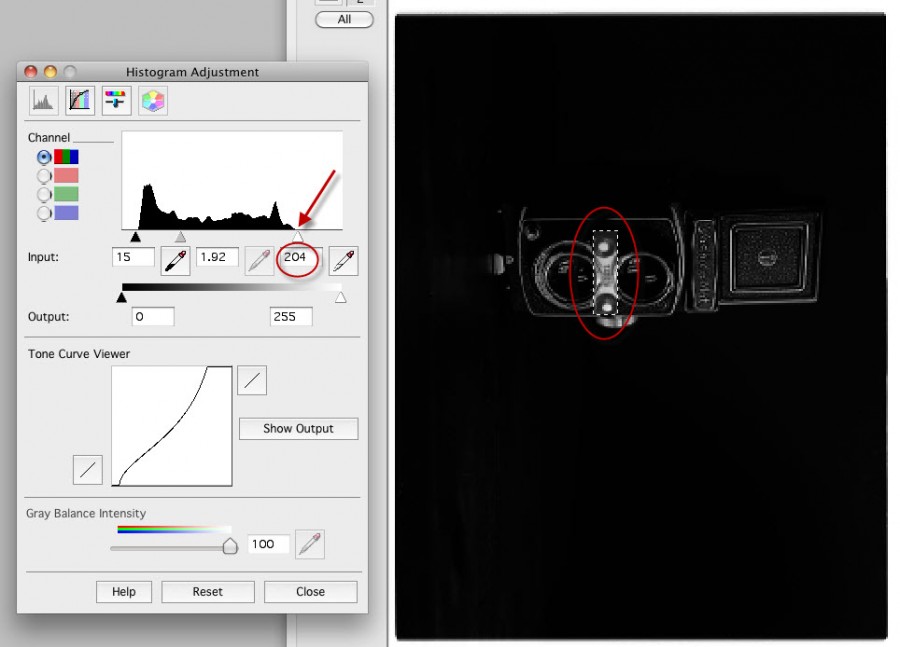
Here’s an example of how I originally set the points, which resulted in clipped highlights. When the whole frame is selected, the small area of highlights does not show up on the histogram resulting in me choosing a white point of 134:

But after selecting a much smaller area of the frame where there are strong highlights, the histogram updates to show just what’s within the selection. This shows that the white point should really be set to 204 – a huge difference!
The resulting scan:


Iain Kendall
This is really quite interesting. I have done this with shadows before but not highlights. It has changed how I look at the histogram and will give it a try.
In the example above, what made you choose 1.92 midtone?
James
Hmmmm, I’m not sure if 1.92 midtone was my final selection – it might have been. Generally though I do it visually making sure that everything is fairly bright. I don’t think the midtone has a great impact (if any) on the resulting scan, which will always be processed in Photoshop and Lightroom. I adjust the midtone in PS and/or LR after further tweaks to the white and black points to give me the brightness I’m looking for.
Glad you found it interesting Iain, thanks for commenting!
Iain Kendall
Thanks for the info. I’m definitely trying this out now.